
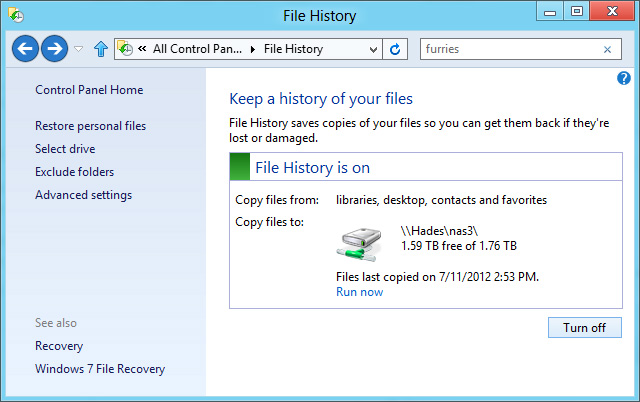
Windows 8 comes with a new feature called File History which can automatically back up files and even can restore previous versions of files. File History does all its work in the background while you are busy doing anything else in the system. We all know backup is an essential part of computing, it helps us to recover the data even after it is being deleted, lost or corrupted. But unfortunately many Windows 8 users don’t know about File History even they have been working with it for a long time.
By default, File History is turned off to start backing up and creating a history of your files you need to turn it on. It needs some external storage device like USB flash drive, USB hard drive or any network drive to back up your files. When you turn on File History, it automatically finds your USB and start working without delay. It backups only Libraries files like documents, music, photos, and other media. It also lets you include and exclude other folders to your Libraries. You have to follow the steps bellow to turn on the File History.
To turn on File History
- Bring up the Charms Bar by pointing mouse into right-hand corner or by pressing Windows-C
- Click the Search icon
- Enter File History in the search box and select settings
- Choose whatever storage you want to use, and then click the Refresh icon next to the address bar
- Click turn on
To restore your files
- Point mouse on the upper-right corner of the screen, and select Search by moving the mouse pointer down
- Enter Restore your files in the search box, and then select Settings
- Select Restore your files with File History
- Enter the file name in the search box, or use the left and right arrow s to look through all folders and files
- Select what you want to restore, and select the Restore button
By default, it restores files to its original location, but if you want to restore your files to a different location , then right-click the Restore button, select Restore To option to choose a new location.